

How To Set Toe In
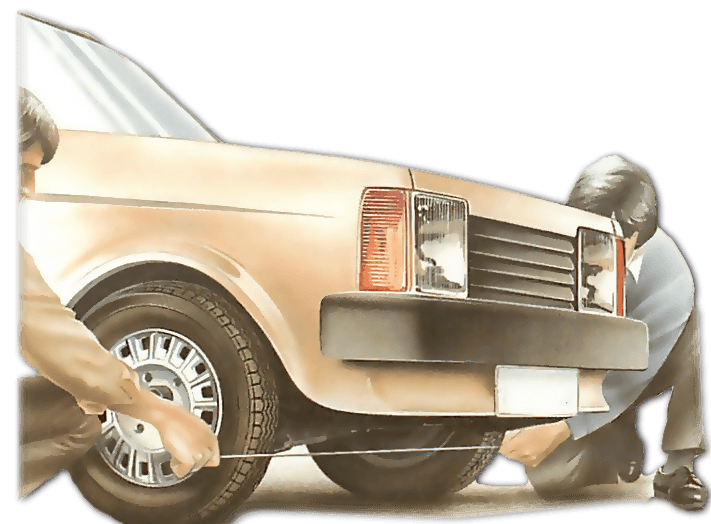
Forepart wheels wrongly aligned cause uneven tyre wear and may seriously affect the car's handling.
Toe-in or toe-out - the corporeality past which the wheels are closer or further apart at their front end edges than at their rear edges - is adaptable on all cars.
The setting can become wrong because of an wrong adjustment, or through driving hard on to a kerb.
Camber - the angle at which a cycle leans in or out - is not unremarkably adjustable. Only if y'all discover that information technology is unlike on the ii sides of the machine, something is incorrect with the tyres, wheels or suspension. Check them (Run across Checking interruption joints and pivots ).
The amount of toe-in or toe-out is very pocket-sized - typically 0.3 to i.6 mm - and must be set past a garage with special equipment. Just you can make a rough adjustment by altering rails-rod lengths.
To roughly cheque toe setting, use a length of string, preferably, or new, unkinked electrical wire.
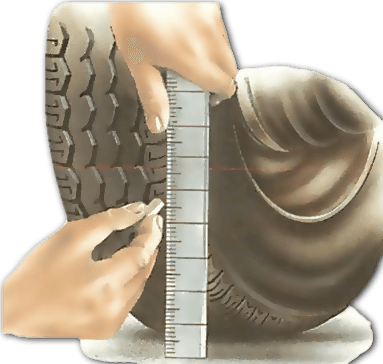
Slant, as well, can exist checked only approximately, because the sidewall of a mod radial-ply tyre e'er bulges outwards slightly in the area where the tyre contacts the basis . Most motorcar wheels lean out at the top, so divergence from the vertical is measured at the bottom.
If y'all suspect from irregular tyre wear (See Checking for bicycle and tyre damage ) that something is wrong, check both the toe settings and the camber to make certain the machine is drivable.
Adjust the toe setting if necessary so that you can safely drive the car to a garage for good attention.
Bank check the toe setting if you accept dismantled and reassembled any part of the track or necktie rods , and once again have a garage re-check it.
Checking toe setting
Remove whatsoever heavy loads from the auto. Inflate all tyres to the right pressures . Check the steering and pause joints for wear (See ).
Make sure that the rails rods are straight and the same length on both sides.
This does not apply to those VWs and Audis with ane adjustable and one fixed track rod (See Replacing other types of track rod ).
Identify the automobile on a flat, even surface — not a road, which is cambered — and eye the steering. Push the auto forward a few yards, letting it stop without using the brakes .
Bounce it a few times to settle the suspension. Later this, practice not touch on the steering wheel or arrive the car.
Find measuring points on each front end wheel. The car handbook usually gives the toe setting as measured between the inner wheel rims at their forepart and rear edges at the level of the hub .
There are, however, few cars on which you can stretch a string or wire direct between these points because the axle is in the way. Measuring between the edges of the tyre treads is not usually practicable because the tread frequently has no clear edge.
Therefore measure from ane outer wheel rim to the other. A wire check cannot be truly accurate, then information technology does not matter as well much that y'all are not measuring from the 'right' points.
All you lot can establish is whether the wheels have a slight toe-in or toe-out — not exactly how much the measurement is.
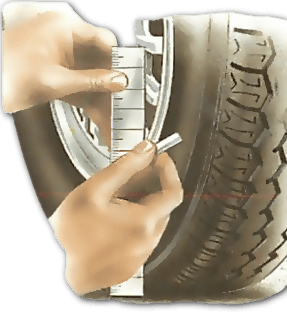
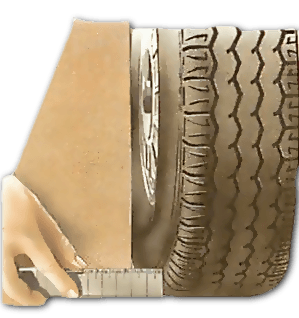
Stretch the wire round the tyres as shut to the top of the hub centre as possible, and pull it taut at both front and rear.
Mark this level on the tyres with chalk and a ruler.
Mark the wire near one stop, and so get a helper to concord the mark on one measuring point and have the wire over to the other.
Pull information technology taut and mark the wire where it touches the second measuring point.
Echo the process at the rear of the wheel, trying to continue the same tension on the wire. The altitude betwixt the first and second marks on the wire is double the toe-in or toe-out.

Double cheque by rolling the car forward then that the wheels make half a plough, bounce the car and echo the whole test.
Checking the camber
Set up the car in the same manner as for the toe-in check.
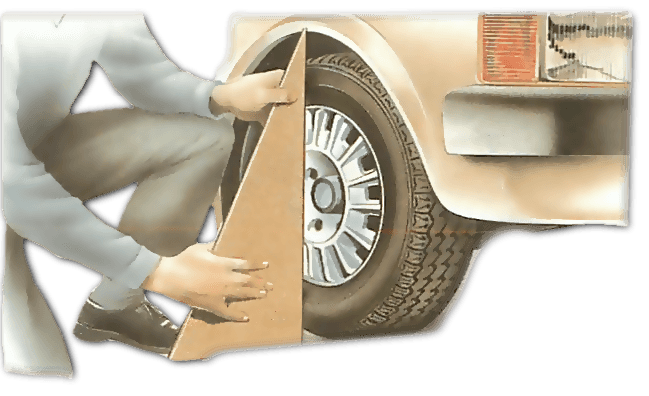
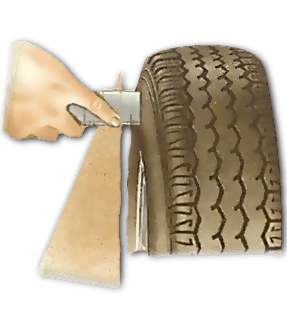
The ideal measuring tool for a camber bank check is a builder's square, simply anything with a perfect correct-angle will do - such as a slice of hardboard.
Hardboard or bill of fare is best for wheels and protruding hubs, equally you tin cut a piece out to gear up the border against the sidewalls.
One side of the card should exist as long as the total height of the wheel, the side at the right-angles to it as least half that pinnacle.
Ready the carte confronting the wheel, upright and key, then that the long side touches the sidewall in the two places and the other side is square to the ground. If necessary remove the hub cap or cut a piece out of the card.
At that place will be a gap between menu and tyre, probably at the top. Measure the gap.
Repeat at the other cycle. The two measurements should be the same. Move the motorcar forward so that the wheels make half a plow, bounce it and repeat the test.
Positive slant
Negative camber
The camber is not commonly adjustable, so if the measurements are essentially unlike, the tyres, wheels or suspension may be distorted. Distorted wheels or tyres should be replaced.
Adjusting toe-in and toe-out
Toe-in and toe-out adjustments are fabricated past screwing the rails-rod ball-articulation ends upward or downwards the track rods to alter their length.
It is not possible to make totally accurate adjustments at domicile without proper wheel-adjustment equipment. Simply the measurements obtained by the wire method already outlined should enable you to adjust the settings accurately plenty to drive to a garage for expert attention. Few cars have a toe-in or toe-out of more than 3 mm, and then endeavour to accommodate to within that measurement if possible.
Information technology is non necessary to disconnect the t rack rods; the inner ends of the track rods turn freely on their ball joints at the ends of the rack as you turn the rods to adjust their outer ends.
Adjust both rods by equal amounts, except on VWs and Audis, which accept only i adjustable rod to change their steering. Even when the fixed rod has been replaced with an adaptable exchange part, the steering is still adapted by altering a single rod.
Y'all may be able to adjust the track rods without raising the front of the auto. This saves time and labour, since you lot have to check the toe setting each time you accept to make a trial adjustment and this must be done with the wheels on the ground.
But on some cars you lot may have to remove the wheels to gain access to the ball-joint locknuts.
If yous accept to raise the car and piece of work under it, use ramps (or axle stands if you take to remove the wheels) not jacks.
Utilize the handbrake firmly, and chock backside the rear wheels.
Adjusting the track rod
Loosen the clips at the outer end of the rack gaiters on a rack-and-pinion steering. Make sure each gaiter can turn freely on the runway rod, but do non push button it up or down: its exact placing is important.
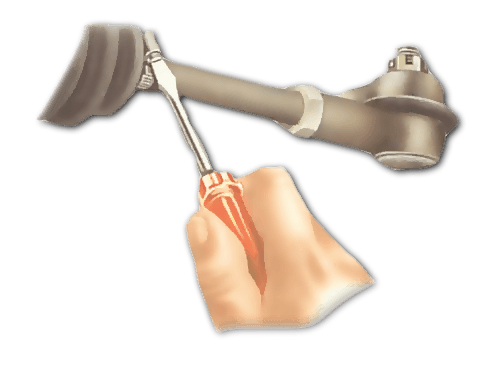
Concord ane rails-rod ball articulation with self-locking grips to terminate it from turning, which would damage information technology. Unscrew its locknut two or iii turns.

One rod may have a left-hand thread: look carefully earlier unscrewing and standard bolt if you are non sure.
Standard bolts have a right-mitt thread: turning a nut clockwise shortens the distance between the nut and bolt caput; turning it anticlockwise lengthens the distance. A left-hand threaded bolt works in the opposite way.
Cars with steering-box systems have ball joints at both track-rod ends. Slacken both locknuts. One on each rod always has a left-hand thread.
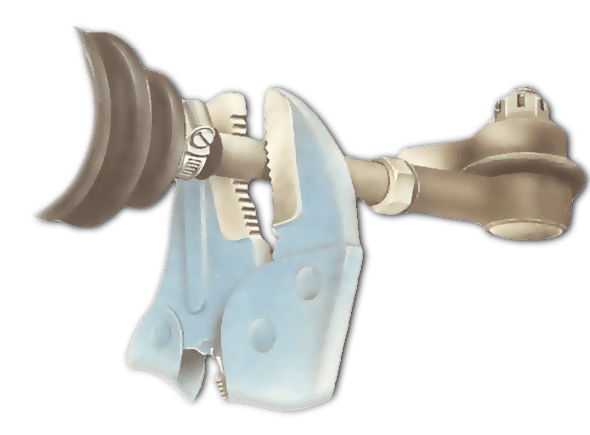
Turn the track rod with self-locking grips to lengthen or shorten it. Some rods have flats which can be gripped by a spanner.
Which way you turn the rod depends on the thread. Bank check before you turn. Requite both rods half a turn, then remeasure the toe setting. Readjust and retest until you lot are satisfied.
Some track rods have a short sleeve with a correct-handed thread at one terminate, and a left-handed thread at the other. The sleeve connects the 2 halves of the rod. Turning the sleeve alters the length of the rod.
Ensure that the ball-joint stud is in the center of its travel, so that the joint can motion freely on the steering arm . Grip the joint and tighten the locknut.
Straighten the rack gaiters, taking care not to alter their position on the track rod, and tighten their clips. On steering-box systems, tighten the inner ball-joint locknuts.
Adjusting a 2-piece rail rod
Many classic Renaults have two-piece track rods. The inner department screws directly into the rack end, and has a locknut outside or within the rack gaiter.
If you notice your car has an adjustable outer track rod, adjust this as normal, do not endeavor to adjust the inner rod which in this case is fixed.
Separate the two halves of the road by removing the commodities. Loosen the inner gaiter clip and then that the whole gaiter can turn. Or push the gaiter off the edge of the locknut plate .
Slacken the locknut, screw both inner track rods in or out in exact half turns - the bushed center on the end of the rail rod must stay vertical.
Reconnect the outer rails rods and examination the toe-out, or toe-in, as outlined previously.
Source: https://www.howacarworks.com/steering/adjusting-toe-alignment-on-wheels
0 Response to "How To Set Toe In"
Post a Comment